You’ve been given the responsibility of renovating your old home, which includes waterproof plywood or maybe you’ve chosen to construct a weatherproof structure, and plywood is your preferred wood.
No matter because you need to waterproof plywood, the main concern is whether it will hold up to the elements.
Do you have the necessary knowledge for the task?
Waterproof plywood is necessary because water-resistant plywood in most cases is simply insufficient.
Plywood is a low-cost wood alternative, especially if you require wider pieces. If you’re going to use your plywood outside, it’s also very simple to waterproof!
Paint, polyurethane, or epoxy finish can be used to waterproof plywood.
Lightly sand the plywood with 180 fine sandpapers, clean up any sawdust, and apply the finish with a brush or by pouring if using adhesive.
You can learn how to waterproof plywood in this guide with all the other information you require to seal plywood for outdoor use.
We haven’t just provided instructions on waterproof plywood structures; we’ll discuss all of the top plywood sealer products currently available.
You should read the whole article because I’ve discussed 8 ways to waterproof plywood by yourself in this article.
Let’s Begin!
What is Waterproof Plywood?

Waterproof plywood should be used to construct any cabinets or furniture that will frequently come into contact with water.
The bonding substance, which is typically a synthetic plastic resin that makes it impermeable to water gives the object its water-resistant properties.
It is preferred for spaces like bathrooms and kitchens where there is a high likelihood of prolonged exposure to water.
The most common sizes of plywood boards are 4′ x 8′ and 3′ x 7′, as well as variations in these sizes.
The thickness is between 3 and 25 mm. pre-veneered or pre-laminated plywood boards can speed up the finishing process.
However, these pre-finished ply boards derive from a limited number of veneer or laminate finishes.
For a wider selection of colours and finishes, choose the laminate or veneer separately and have it pasted on the ply by the carpenter.
Steps for Waterproof Plywood:
Step 1. Set up your work area:

Selecting a well-ventilated location for your project should be your priority, it could be an enclosed area like a garage or carport.
Put on a safety mask first because when you waterproof plywood, some materials emit fumes that you don’t want to breathe in.
Additionally, you don’t want the sanding dust to get into your lungs as you prepare the board for sealing.
To avoid getting the sealer you will be using on your skin, wear a set of hand gloves.
Safety goggles are another choice for eye protection.
Next, spread out a tarp to protect the floor and anything else in your workspace that the sealer and sanding dust might damage.
Step 2. Fill in any gaps:

Before waterproofing, knot holes in the less expensive plywood should be filled.
Otherwise, the height difference presents a chance for water to seep into the plywood.
Press wood filler into the knot holes, slightly overfilling it since wood filler tends to shrink as it dries.
Sand the wood filler down to match the plywood surrounding it, after it has dried (at least 20 minutes, but possibly an hour if it’s a large hole).
Step 3. Apply wood filler to any ridges or rough areas:

Once you have put together all of the materials required for the sealing project, check the board to ensure sure it is level on the surface and the edges.
Fill in any grooves or noticeable rough areas, especially on the sides with wood filler to make the sheet appear more uniform.
To make room for sanding, let the filler protrude just a little bit above the surface.
This step is crucial to making sure there are no gaps that might prevent waterproofing.
Before proceeding to the next step of waterproofing plywood, give the filling product the time it needs to harden and dry, as advised by the manufacturer.
Step 4. Prepare the plywood for sealing:

At this stage, the protruding wood filler until it is flush with the surrounding surface.
Before sanding, wash the sheet around the filled areas with a damp rag to mildly raise the grain.
By doing this, the sealer’s bond to the plywood sheet is improved.
Next, use medium-grit sandpaper to thoroughly sand the entire sheet.
Wipe away any sanding dust.
Use fine-grain sandpaper such as a 180-grit piece, once the plywood sheet feels smooth to the touch.
With a dry natural-bristled brush or cloth, clean the surface of any debris and sanding dust.
Step 5. Apply the sealer of your choice:
Any sealer you select will have instructions for how to apply it and how long to wait between coats; make sure you strictly adhere to these instructions.
Typically, the product label contains this information.
Use a chip or foam brush, a paint roller, or a spray bottle when applying the sealant.
We suggest rolling on epoxy or varnish and then immediately brushing it on with a foam brush or premium chip brush to remove the texture the paint roller left behind.
It’s important to tip quickly, against the grain, and before the surface becomes tacky.
Additionally, varnish can be sprayed on.
You might want to consider spraying whenever it is one of your choices because it is equally ideal for all of the remaining sealers.
In any case, be sure to apply several thin coats rather than a few thick ones to completely cover the surface.
Also, make sure each coat is completely dry before adding the next.
Step 6. Allow it to dry before sealing the screws:
Although the majority of sealers will dry fast, you should wait at least 24 hours before installing plywood.
To make the entire structure watertight, we advise covering the nails or screws after installing the plywood sheet.
The sealed plywood surface may have some holes that need to be filled, so keep looking for them.
By avoiding serious damage, this precaution can help you get the most use out of your plywood framework to waterproof.
Step 7. Apply the waterproofing finish:

Choose the paint, polyurethane, or epoxy waterproofing finish of your choice and apply it.
A roller or a paintbrush can be used to apply paint or polyurethane.
Typically, epoxy resin is poured directly onto the plywood.
Due to its thickness, polyurethane will have brush or roller marks.
This coat will not have brushstrokes because it is applied with a rag, and it will dry quickly, preventing dust and dirt from becoming trapped in the finish.
Step 8. Allow to dry and reapply the coating:
Each product has a different dry time.
Paint can typically be recoated in about two hours, whereas oil-based polyurethane requires a full 24 hours between coats.
You’ll require at least two coats of polyurethane and paint based on the hardener chosen, epoxy resin dries at different rates.
Whatever the case, you only need to apply one coat of finish.
Methods for Waterproofing the Plywood:
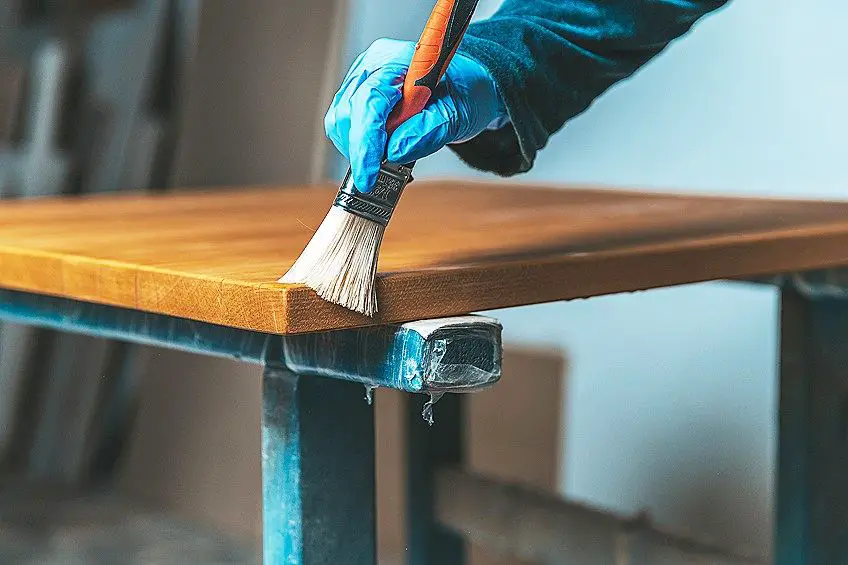
1. Using Paint to Waterproof Plywood:
It is quick and simple to waterproof plywood by painting it.
Interior latex paint is best for indoor projects, while exterior latex paint is preferable if your plywood will be used outdoors.
The plywood will be properly waterproofed by both paints, so that shouldn’t be a factor.
I’ll freely admit that I’ve waterproofed something by grabbing some paint and slapping it on too quickly.
Fortunately, the paint is holding up well despite the snow covering it right now.
The paint job and your project will last longer if you take a little more care.
The paint adheres to the plywood very well with the help of a powerful bonding primer because the bonding primer is so awesome, that you won’t need to sand before painting if you use it.
The primary objective of sanding is to leave scratches on the plywood so that paint will have something to adhere to that is unnecessary thanks to the bonding primer.
If your plywood is truly a concern, another option is a topcoat.
It can be waterproofed using only exterior paint, but if you want extra protection if that paint fails, adding a topcoat is the best option.
2. Polyurethane varnishing method:
Polyurethane varnish is one of the best sealants for waterproof plywood.
The surface becomes impervious to water, moisture, and scratches when it dries into a super-tough coating.
In high-traffic areas, polyurethane varnish is typically used to coat wooden stairways, floors, and other surfaces.
They work well for waterproofing surfaces made of chipboard, hardboard, parquet, and plywood.
Varnish can be applied to a surface using a paint roller and pad, a brush, or a sprayer.
Apply a light, even coat and let it dry for the advised amount of time before adding the subsequent layers.
Your plywood boards will be resistant to the corrosive effects of the outdoors when the resin mixture has dried completely and formed a strong, clear coat that is impervious to water.
3. Use a penetrating epoxy sealant:
Like varnish, epoxy sealant dries into a tough layer that is impervious to water, scratches, and dents.
It is among the best and most widely used methods for sealing plywood used outdoors, both clear and tinted versions of the epoxy sealant are available.
However, it frequently has a thicker consistency than polyurethane varnish.
Due to its thickness, spraying is a less practical method of applying it to the plywood’s surface.
We suggest using a paint roller to apply epoxy.
For best results, use it both against and within the grain.
Don’t forget to tip the surface with a foam brush as soon as epoxy has been applied to smooth out the texture the paint roller left behind.
Before adding the subsequent layer, let the previous thin coat dry completely (usually for about an hour).
4. Applying latex spray:
Liquid latex is sold in a spray can, it is the simplest way to waterproof plywood for outdoor use.
For bigger projects, it’s also accessible in larger containers.
For instance, if waterproofing a dozen or more plywood sheets in their entirety, you might think about using a paint sprayer.
Spray-on liquid latex should do a fantastic job of sealing the plywood surface, but the edges will need to be waterproofed with epoxy or polyurethane varnish.
5. Oil drying method:
While most waterproofing products form a hard coat, drying oil does not.
Instead, it seeps into the pores of the plywood, sealing them and preventing water from penetrating the sheet.
As a result, the edges will need to be sealed with a more robust product.
Epoxy or varnish should do the trick for sealing the edges of plywood sheets.
The use of drying oil is advantageous because it keeps the plywood relatively flexible and helps it retain some of its natural moisture.
Instead of making the plywood watertight, the oil in this way makes it stronger against water damage.
Advantages of Waterproof Plywood:
- Plywood is more robust and long-lasting.
- The board’s core, front, and back faces can all be constructed from a variety of materials because it is made up of layers of wood veneers.
- A cross-section through the board will make the different layers in the section visible.
- Phenolic resins are employed as binding substances, they endow plywood with their water-resistant qualities.
- Due to the board’s cross-grain construction and alternate layers of plies, it is dimensionally stable.
- Plywood easily accepts screws and has a strong screw-holding capacity.
- It is resistant to fungus and mould as well as termites and borer damage.
- The plywood surface of the furniture can be covered with veneers to give it a real wood finish.
- Additionally, it can be laminated.
- To increase the durability of shutters and boxes, the plywood’s cut outer edges must be sealed with edge banding tape, membrane, or wooden beading.
- The core of plywood is not uniform, making it impossible to carve or mould into various shapes like MDF.
- Plywood is less costly than solid wood, but MDF is less costly.
Also read: What Is Chipboard Furniture?
FAQ: How to make Plywood Waterproof?
The most effective and widely used substance for waterproofing plywood sheets is probably an epoxy sealer.
The transparent, viscous liquid hardens into a shell that covers the plywood’s entire surface.
Spray and paint versions of epoxy are both available, whichever option you select will produce the desired effects, strengthening and making the plywood water-resistant.
Yes, by spraying liquid latex, waterproof paint, or varnish on plywood, you can make it waterproof.
To seal it and make it water-resistant, you can also coat it with hard-drying oil or epoxy sealant.
You can waterproof plywood with liquid latex.
As a choice, you can waterproof plywood by sealing it with epoxy sealant, clear-coloured polyurethane varnish, or spray-on waterproof paint.
Also read: How to Remove Wood Stain from Carpet?
Conclusion:
For your house, patio, or shed to last, you must figure out how to seal and waterproof plywood.
Anyone can make plywood completely waterproof with a few straightforward steps and a little bit of care!
Additionally, if you choose your plywood carefully, you might never even need to waterproof it yourself because some types of plywood are waterproof or water-resistant.
Although plywood may have a smooth appearance, it is still made of wood and has pores on the surface.
The board is also very porous at the edges due to the veneers being layered to create it.
To withstand the elements and any damp environments, it will need sealing all around.
As you can see, understanding how to waterproof plywood is extremely easy, this guide should help you find a technique to waterproof plywood.
Section Under: How To