Door sweeps are essential and they are regularly attached at the bottom of the door, we have described the features of the different types of door sweeps you might use.
Many undesirable things such as draughts, water, pests, and dirt can arrive at your home through the space between your door and the floor.
You need a door sweep to help create an airtight seal that prevents from entering.
We have discussed 11 different types of door sweeps with their benefits and drawbacks.
A step-by-step installation checklist for each door bottom is also included, This will assist you in installing it without the assistance of a professional.
So, let’s get going!
11 Types of Door Sweeps for Interior Doors:
Door sweeps are available in a range of materials and styles, they are made to fill the space between the door and the floor.
Here are 11 various types of door sweeps with some information you should be aware of it.
1. Door Sweep with Self-Adhesive:
Self-adhesive door sweeps are attached to the door with an adhesive strip that is made of rubber or vinyl.
They are easy to install, and you may cut them to size with a tool knife.
However, not all door materials may take the adhesive strip and the door sweep may need to be changed frequently.
Self-adhesive door sweeps also don’t seal the door as some of the other kinds of door sweeps do.
But if you want a reasonably priced, simple-to-install door sweep is a good choice.
Step-by-Step Installation Process:
- Begin by thoroughly cleaning the door to ensure proper adhesive adhesion.
- Cut the door sweep to fit the opening with a utility knife after measuring the door.
- Before securing the door sweep the door, and remove the adhesive backing.
- To ensure that the adhesive strip is securely fastened, apply pressure to the door sweep.
2. Auto-Door Sweep:
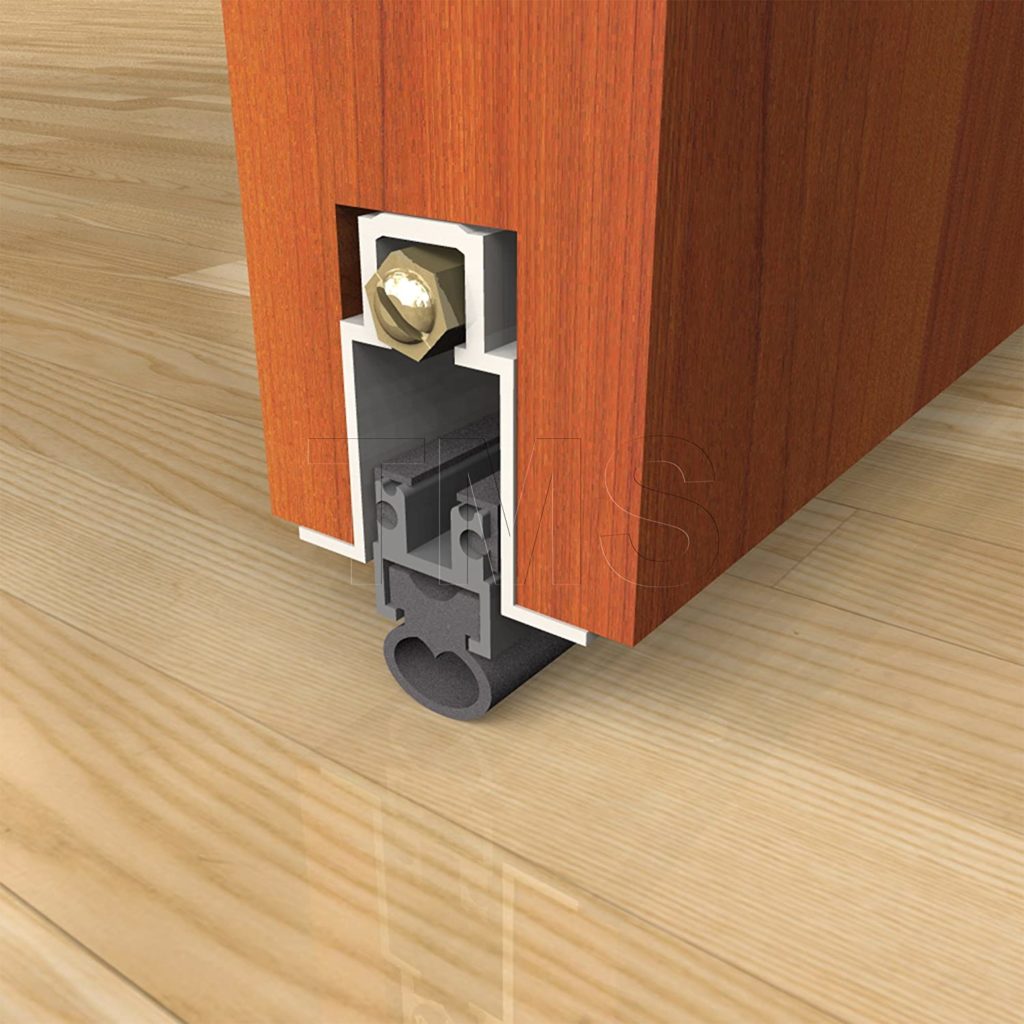
An automatic door sweep also known as an active door sweep is a types of door sweeps that is stimulated when the door is closed.
The spring-loaded component automatically covers the gap between the door and the floor when the door is closed.
It can be used on surfaces up to 1-3/4 inches thick that is flat or bevelled.
They are typically constructed of sturdy material such as aluminium or stainless steel with a rubber or brush seal that helps to keep out draughts, dust, and insects.
It might not function well on warped or bowed doors as it is spring-loaded which can be a little noisy when it activates.
Step-by-Step Installation Process:
- The size of the door sweep is determined by measuring the door and the doorway.
- If necessary, cut the door sweep to size.
- Use screws or adhesive to secure the door sweep to the door.
- Check the door sweep’s functionality by using it.
3. Flat Door Sweep:
A door sweep style known as a flat door sweep is constructed from a single piece of material.
It is made typically of a flexible material like plastic or rubber intended to fill the space between the door and the floor.
It can be applied to interior and exterior doors including wooden or metal thresholds.
A flat door sweep can also accommodate gaps as big as 4/4 inches in size.
This kind of door sweep might not function as well if the bottom of your door is very uneven.
It cannot be adjusted to different heights like some of the other types in this list because it is only one piece.
Step-by-Step Installation Process:
- The door and the vicinity should be cleaned.
- The door sweep should be cut to fit the door’s width.
- Attach the door sweep to the door using screws, nails, or adhesive.
- Verify that the door sweep is flush with the door and level.
4. Brush Door Sweep:
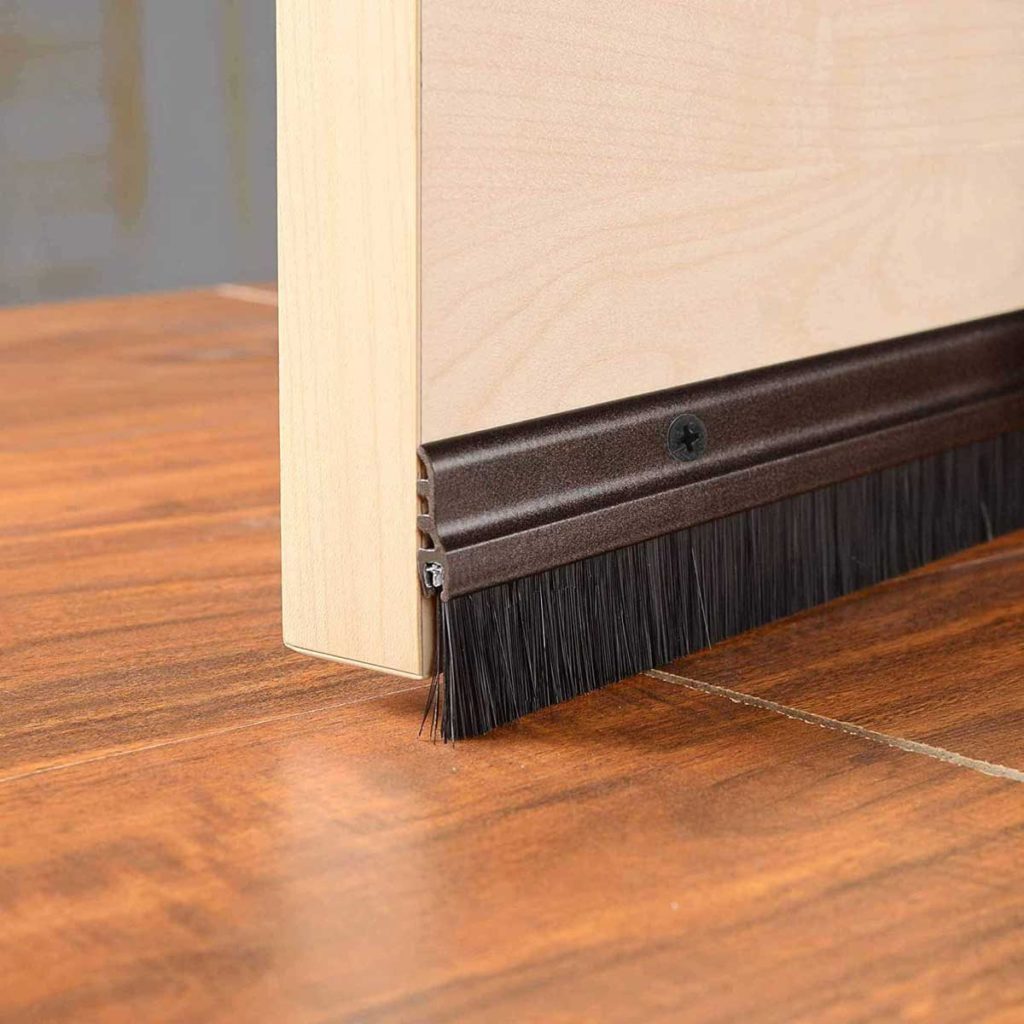
Brush door sweeps are popular types of door sweeps, they are constructed from a row of bristles that are fastened to a plastic or metal strip.
Nylon, polypropylene, and horsehair are just a few of the materials that can be used to make the bristles, which are intended to brush against the floor.
To prevent debris from becoming fixed in between as your door opens and closes, the bristles sweep it away toward the sides of the door.
They may also be applied to the doors’ top and bottom.
Besides, brush door sweeps are less likely to scratch your floors since they are made of natural materials.
Step-by-Step Installation Process:
- Start by measuring your door’s width.
- The brush sweep should be hacksawed to the proper size.
- Make use of screws, nails, or adhesive to secure the sweep to the door.
- Using a drill, make pilot holes for the screws (if needed).
- Install the sweep using screws or nails.
5. Fins Door Sweep:
Fins or bristles that extend from the bottom edge of a long strip of flexible material are used to make fins door sweeps.
Bristles can be made from a variety of materials including nylon, plastic, and metal.
Fins door sweeps are mounted inside the door and secured there with screws or adhesive.
Fins door sweeps work well to keep out pests, dust, and draughts.
Moreover, installing them is not too difficult.
The bristles may be challenging to clean and may degrade over time.
Fins door sweeps are still a solid choice for the majority of homes/
Step-by-Step Installation Process:
- To match the gap between the door and the floor, the door sweep needs to be cut.
- The door sweep should be fastened to the inside of the door with screws or adhesive.
- Make sure the bristles are pointed downward so they can make touch the floor.
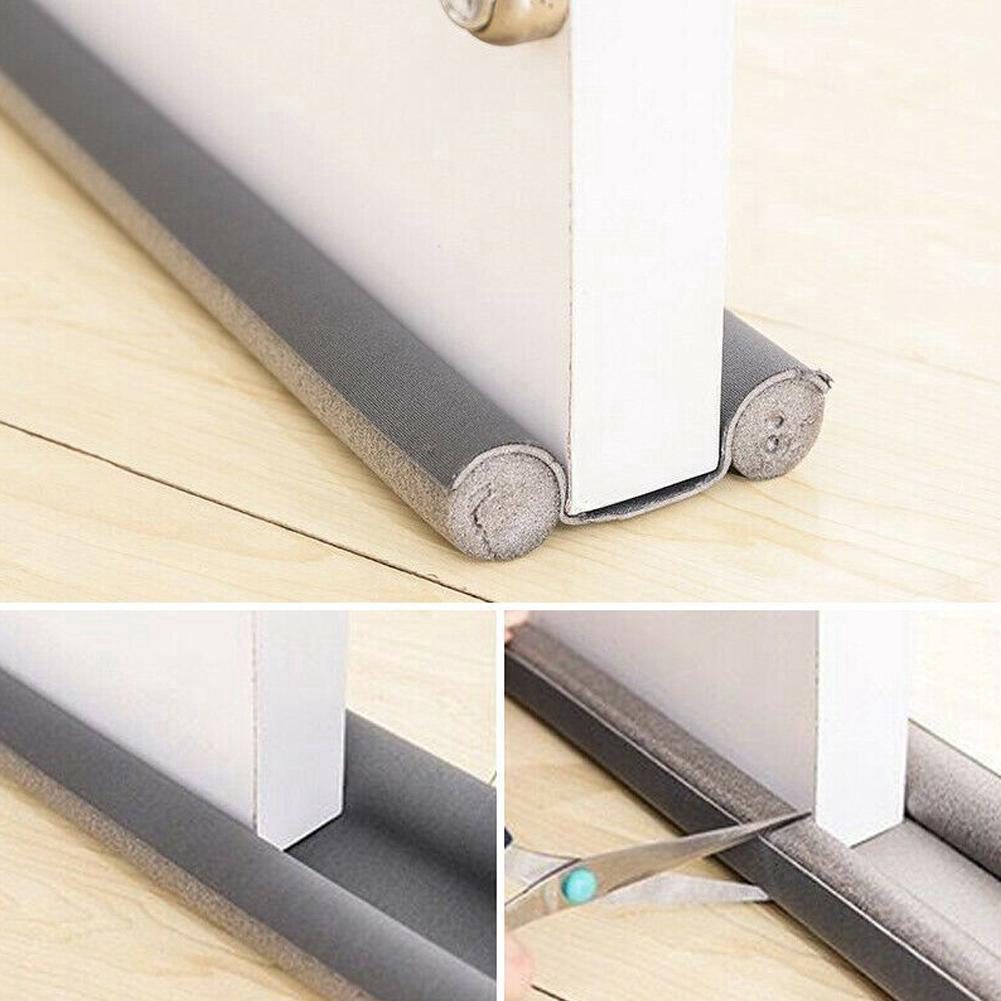
6. Double Bubble Door Sweep:
A bubble design in the middle of the double bubble door sweep and is constructed from two layers of PVC that aid in insulating the door.
The best types of door sweeps for doors in cold climates are because it helps to keep the heat inside.
Additionally, they are less likely to be damaged, double bubble door sweeps are good for doors situated in high-traffic areas.
The double bubble bottom seal’s effective noise-cancelling abilities allow it to use in offices and other settings where low noise levels are required.
Step-by-Step Installation Process:
- To begin, measure the door to ascertain the appropriate length for the door sweep.
- Utilizing a sharp knife or a pair of scissors, trim the door sweep to size.
- Once the adhesive backing has been taken off, stick the door sweep to the bottom of the door.
- Make sure the door sweep is firmly fastened by applying pressure.
7. Door sweep rods:
Door sweep rods are typically installed on either side of French or sliding glass doors, but even if they can also be used on other kinds of doors.
The rod is attached to the bottom of the door with brackets and slides into holes in your door frame.
It is now simpler for people to open and close the doors without risking damage from their footwear or clothing rubbing against them.
Step-by-Step Installation Process:
- To begin, measure the door to determine the appropriate length for the door sweep.
- Utilizing a sharp knife or a pair of scissors, trim the door sweep to size.
- Once the adhesive backing has been taken off, stick the door sweep to the bottom of the door.
- Make sure the door sweep is firmly fastened by applying pressure.
8. Rubber Door Sweep:
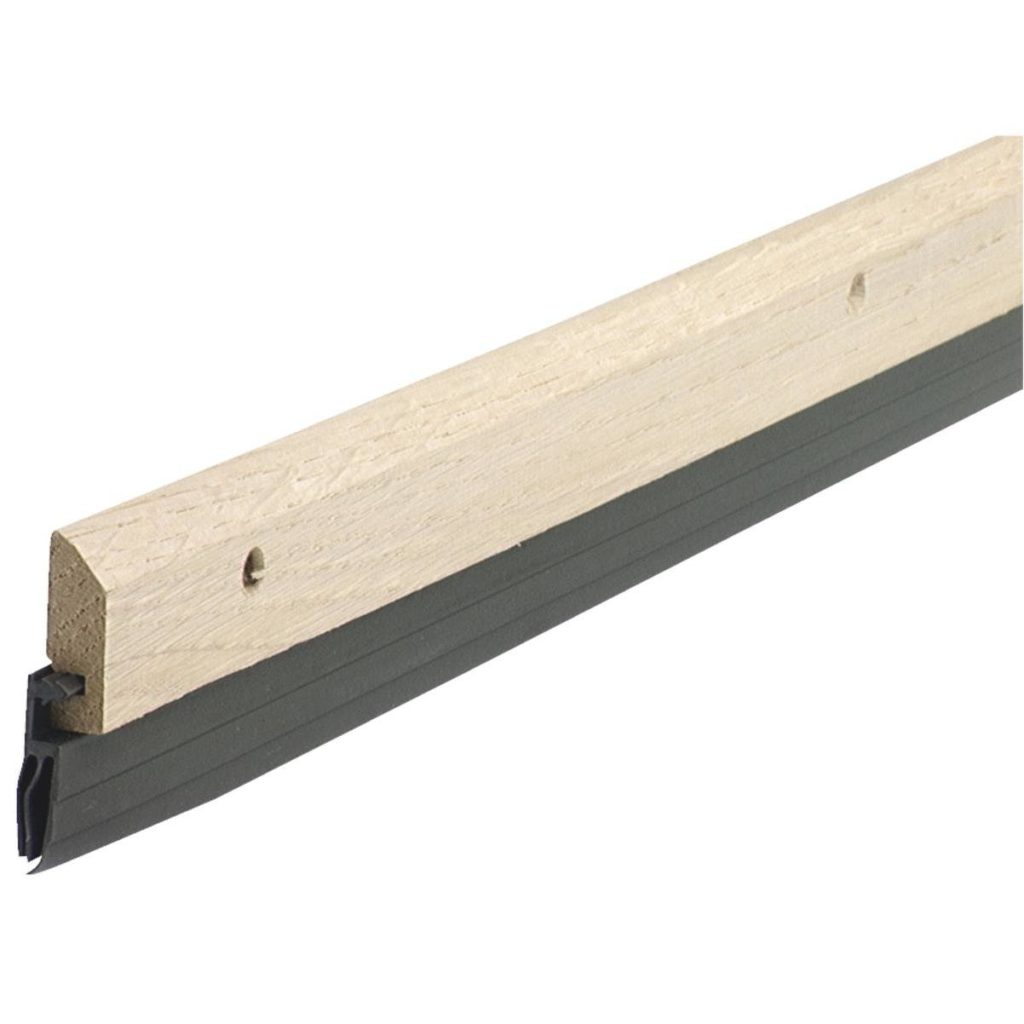
A rubber door sweep is an excellent choice if you’re looking for something inexpensive and durable.
This particular sweep is made of pliable rubber and it is shaped to fit closely against the door.
Additionally, the rubber material will lessen noise.
Rubber door sweeps do have a problem in that they can be challenging to install.
Additionally, the rubber may deteriorate and lose its effectiveness over time.
Due to this, you might have to change your rubber door sweep more regularly than you would conventionally sweep.
Finally, this is weather resistant that requires little to no maintenance and effectively reduces noise.
Step By Step Installation Process:
- To determine the length of the sweep you require, start by measuring the door.
- After that, use a utility knife to trim the sweep to size.
- The sweep should then be nailed in place using a hammer.
- Make sure the sweep is properly seated to the door and the floor is not separated by gaps before closing.
9. Beavertail Door Sweeps:
Beavertail door sweeps can also be referred to as butt hinges or butt hinges with wings.
When there is no space between the bottom of your door and the ground, these types of door sweeps are used.
When you close the door, a rounded beavertail fits over the hinge pin to prevent it from falling into the gap below the door jamb.
Step-by-Step Installation Process:
- To determine the length of the sweep, start by measuring the door.
- After that, use a utility knife to trim the sweep to size.
- The sweep should then be nailed in place using a hammer.
- Make sure the sweep is properly seated and that the door and floor are not separated by gaps before concluding.
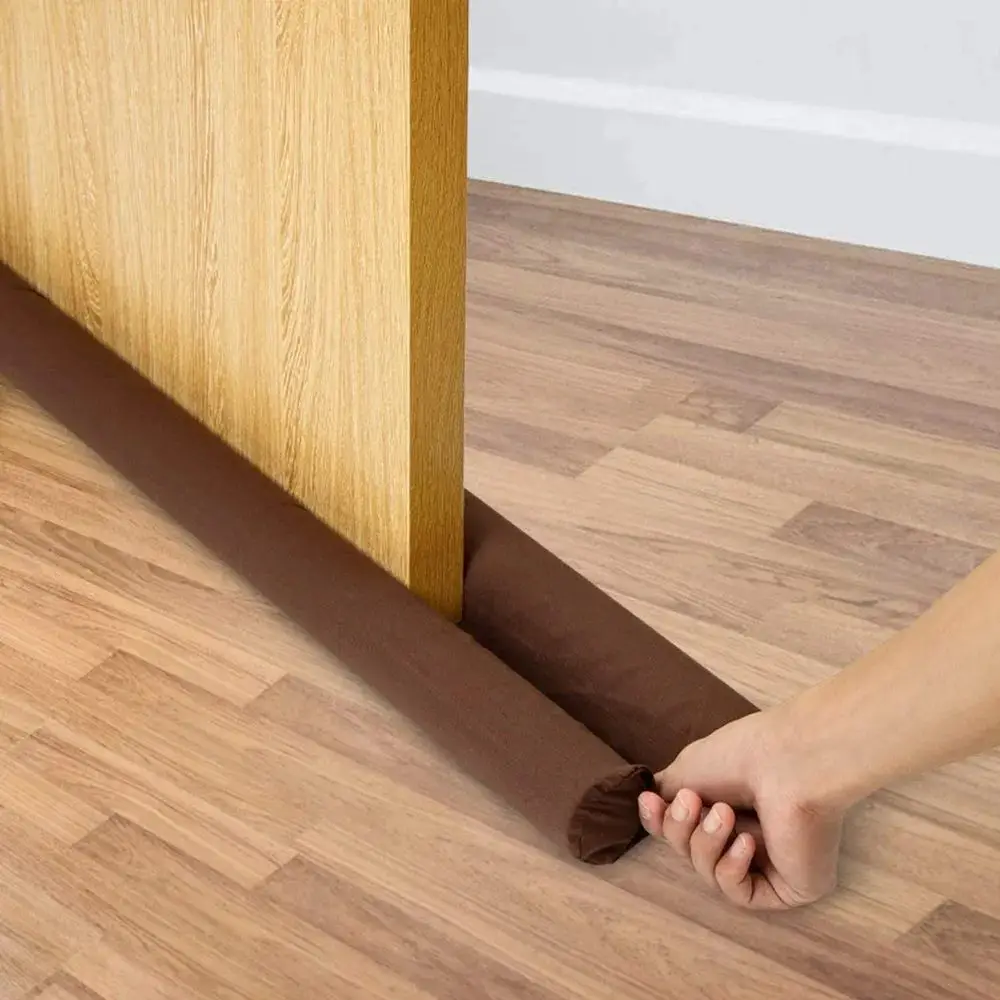
10. Foam Door Sweep:
Foam door sweeps come in two varieties: closed-cell foam and open-cell foam.
Both types of door sweeps are made of polyurethane foam that has an adhesive coating on one side that enables them to adhere to the bottom of a wood or metal door without the need for additional fasteners.
Foam door sweeps are ideal for low-traffic areas like bathrooms, laundry rooms, or pantries where they will be exposed to moisture from muddy shoes or wet hands but won’t experience the same level of wear and tear as hallways or kitchens would.
Step-by-Step Installation Process:
Start by measuring your door’s width.
The brush sweep should be hacksawed to the proper size.
Make use of screws, nails, or adhesive to secure the sweep to the door.
Using a drill, make pilot holes for the screws (if needed).
Install the sweep using screws or nails.
11. Sill Plate Door Sweep:
This style of door sweep is attached at both ends, it is secured in place on either side of the threshold with screws or nails.
You might be able to modify its length in some circumstances to make sure it fits appropriately into any gaps between your flooring material and walls.
You can match it to your decor because it comes in a variety of colours.
Step-by-Step Installation Process:
- To determine the length of the sweep, start by measuring the door.
- After that, use a utility knife to trim the sweep to size.
- The sweep should then be nailed in place using a hammer.
- Make sure the sweep is properly seated and that the door and floor are not separated by gaps before concluding.
Advantages of Door Sweeps:
1. Reduced Friction:
You can contribute to the creation of a smoother surface that will make the door open and close more easily by installing a door sweep at the bottom of your door.
This is especially helpful during the winter when the surface of the door may be more likely to freeze shut.
2. Reduced Noise:
It may be beneficial to lessen the noise that enters the room through the door.
If you live in a tiny space such as an apartment, this might be a significant benefit.
3. Fewer Pests:
All kinds of pests from rodents and bugs to snakes and lizards can be kept out of your home by using a door sweep to seal the tiny gaps and cracks around your doors.
4. Weather Protection:
You can protect yourself from severe weather by creating an airtight seal between the door and the threshold.
A door sweep can prevent draughts from entering, keeping heat inside during the winter and cool air inside during the summer.
Common Types of Door Sweeps Issues & Solutions:
Any door sweeps are an essential element, but they can also cause issues, here are some typical issues with door sweeps as follows:
- It won’t make good contact with the floor if your door sweep is too short which could let draughts and pests into your house.
- Some door sweeps are made of flimsy materials that are easily breakable or quickly degrade.
- Select a door sweep made of high-quality materials like aluminium or stainless steel to avoid this issue.
- Your door sweep won’t operate effectively if it’s not installed properly.
- Make sure the door sweep is fastened in place with screws or nails so that it sits flush with the bottom of the door.
- Door sweeps are prone to damage, especially if they are constructed from shoddy materials.
FAQ: Types of Door Sweeps and their Installation:
You will have to spend between $15 and $20 to install a door sweep at the bottom of your door.
Even though a door sweep is inexpensive, installing one is a quick and straightforward process.
No, installing a door sweep does not require any special installation techniques.
You may easily install it yourself at home.
Just be sure to adhere to the door sweep’s guidance.
A door sweep can greatly minimise the amount of noise that enters your home.
The entire soundproofing might not be as good as the door seals.
Also read: How to Cover Glass Front Door for Privacy
Conclusion:
A door sweep is a strip of material made of metal or plastic that is fastened to the underside of a door.
The sweep forms a barrier that keeps out draughts, wind, rain, and pests by hanging down over the door’s threshold.
Choose the types of door sweeps that best suit your needs from the many different types that are available to start securing your home right away.
Section Under: FAQ