If the origin of the problem is an unstable bed frame, you can easily reinforce it by adding center support to the bed.
Have you ever experienced sleeping on a bed that squeaks and rattles with the smallest turn you make?
When I say it’s one of the most irritating situations, I know I’m not alone.
If you’re considering reinforcing your bed frame to stop the squeaking, you’re at the right place.
I’ll go into great detail and break down each step in making center support in this article.
Learn how to do this project independently, even on a limited budget.
Reading on.
6 Ways to Reinforce a Bed Frame:
1. Remove the mattress and bedding from the bed:

You must remove everything from the bed, including the mattress and linens, before making any changes.
You will be able to see the bed frame more clearly and determine what has to be done as a result.
The support slats may occasionally need to be strengthened or replaced if they are cracked or bent.
Before attaching the center support, you might see that the bed frame has a crack in it that has to be fixed or replaced upon closer inspection.
But most importantly, you must remove everything so that you can measure the bed.
2. Determine the bed’s dimensions:
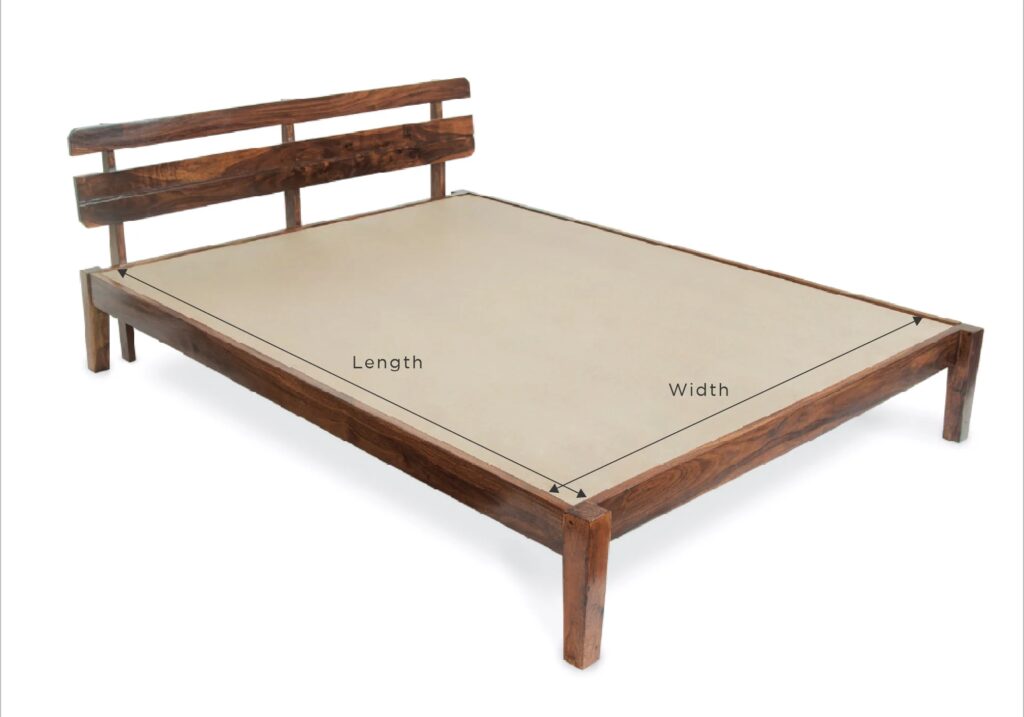
Since there are various bed sizes, you should start by measuring the various spaces that the center support will occupy. To begin, measure the length of the bed from the headboard to the footboard.
Given that the center beam is nailed beneath the headboard and footboard, you should take measurements from the outside of the bed.
The bed frame’s length should exactly match that of the center support.
It is also necessary to measure the height of the bed where the center support legs will be installed. Here, you will measure the distance between the floor and the bed’s slats.
Not least of all, you need to reinforce and gauge the bed frame width. As the middle of the bed is where the centre support bar will be nailed, this will assist you in locating it.
Mark the centre with a marker pen or pencil to help you remember where it is.
Even while it doesn’t have to be exactly in the middle, accuracy aids with bed stability. Having said that, some people favor having an additional support beam running the length of the bed.
3. Compile your equipment and supplies:

The following step is to acquire and prepare the supplies once you have your accurate measurements.
Before you even buy the wood, gather the tools you’ll need to put the center support together. These equipment and supplies consist of:
- Nailing gun
- Nails/screws
- Orbital or table saw
- timber glue (optional)
- Cordless Screwdriver and Drill Attachment
- Measurement tape
Leveling Pencil and Socket Wrench with 5/16′′ Allen Key Attachment
Two long 2″x4″ pieces of wood are required for the bed’s central support beams, which run from one end to the other.
Three 2″x4″ legs must also be cut to match the height specifications you provided. To provide the middle beam extra stability, these legs will be carefully nailed under them.
You can visit a workshop and have the components expertly cut for you if you don’t have the required cutting tools.
If you measure and indicate the locations of the screw holes beforehand, it is also possible to have them drilled at the workshop.
Your work will be easier as a result, and all you need to do is put the support together.
4. Cut the wood pieces to size:
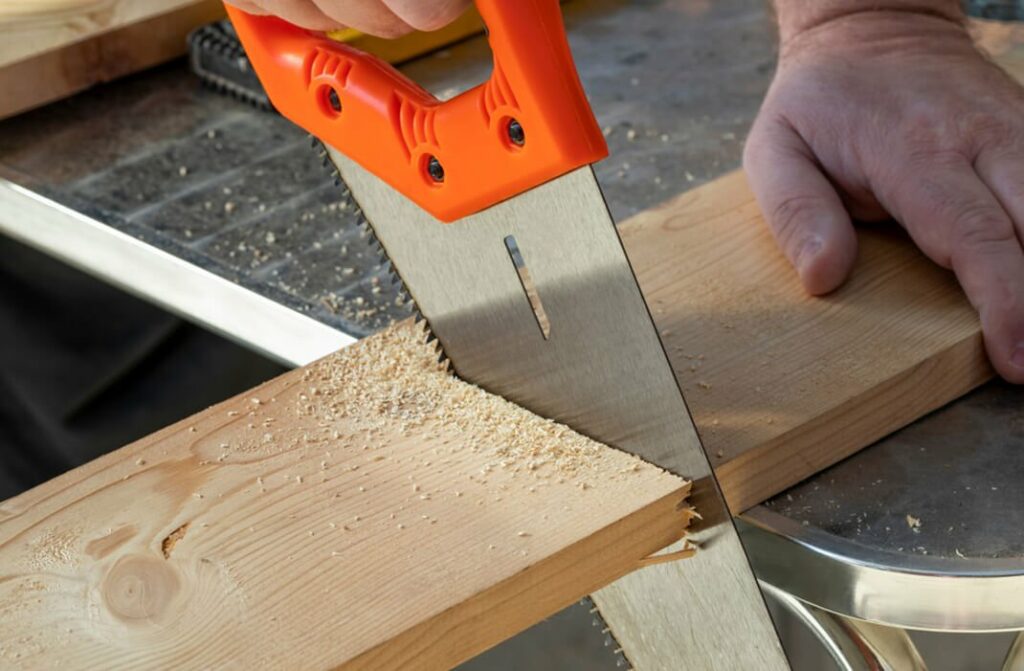
Using the measurements, you took on the available bed, cut the center beam wood pieces to the appropriate sizes. Since all the parts you have should already be 2″x4″, all you are measuring is length.
Make sure the three additional little pieces are appropriately sized to fit beneath the bed slats. Make sure they are all equal to make the bed stable, but more importantly.
People frequently overlook staining or painting the wood when reinforce the center support to their bed frame.
Doing the same for the additional additions will make everything look uniform because the rest of the bed has already been painted and completed.
If you want to protect your wood without changing or obscuring its color, treat it with a water-based polyurethane varnish.
Apply a second application once the first one has dried, and then finish with a coat of bed-frame-compatible wood stain. Give them about a day to dry, then come back the next day to finish the job.
5. Put together the bed’s center support:

The three legs can be nailed to the lengthy center support beam to begin the installation. The remaining leg will be placed in the middle of the beam with the other two on either end.
To firmly fasten the pieces to the underside of the beam, use a power drill or nail gun. Next, slide the long beam under the bed frame so that the legs are in contact with the ground.
Make sure it doesn’t wobble or squeak when you align it with the center of the bed and fasten the beam’s ends to the bed frame.
If your bed frame has a central beam that spans its width, nail it to the long center beam where it meets the wide ends of the bed frame.
6. Replace the slats on the bed:

For your bed frame, you built a robust center support and tested it to make sure everything was solid and stable.
The bed structure shouldn’t wiggle or make any noises. If it does, check to see if the support is securely fastened and slightly tighten the side bolts.
Once you’ve finished, you can replace the bed’s mattress support. To stop the squeaking, make sure the slats are solid and fastened.
Before putting the top board on, proceed to screw them, if necessary, to the bed frame.
Reposition your mattress and make your bed as normal. Try sitting on your new center support or hopping in for a quick sleep.
Also read: How To Stabilize a Wobbly Wooden Bed Frame?
FAQ- How To Reinforce a Bed Frame:
Q1. How can I strengthen the support of my bed frame?
Adding more slats in between the metal of the frame is a terrific method to transform a conventional bed frame into a super-strong one.
When weight is put on the bed, slats will offer extra support and take some of the pressure off the existing framework.
Slats are available online or at the majority of hardware stores.
Q2. How can I give my bed slats more support?
Placing plywood on top of the slats is a fantastic substitute for nailing or screwing them down.
A sheet of plywood improves the platform for your mattress support and prevents the plywood from shifting.
It thereby reduces the likelihood of the mattress sinking.
Q3. Is central support required for a full-size bed?
Kate, Twin, and full-sized beds can be made without center support for king and queen-sized beds; however, you’ll need a frame.
Also read: Can You Put an Air Mattress on a Bed Frame?
Conclusion:
Making the centre support reinforce for your bed frame is not difficult, as you may have previously noticed.
If you are skilled with tools and are familiar with wood, you can do it fast at home, this is the perfect project to start with because it requires little skill if you haven’t done much woodworking.
Simply visit a woodworking shop, instruct the workers to cut the wooden components to your specifications, and then return home to assemble.
You should stain the wood yourself before putting the bed together because that is the enjoyable part.