Grout is a material used to fill up the gaps between tiles available in two finishes: sanded and unsanded grout.
Sanded grout has a finer texture, it is less likely to chip or break and also less difficult to clean than unsanded grout.
It is less stain-prone used with glass or mosaic tiles and it is more stain-resistant used with glass or mosaic tiles.
So, it is tough to figure out which grout to use, hence you should read this article.
Since I talked about the difference between sanded and unsanded grout in this article to make an informed decision.
I’ve also included step-by-step instructions for applying sanded and unsanded grout to the tiles, so it will be a highly informative guide.
Let’s Begin!
What Is Grout?
Grout is a form of mortar used to fill spaces between tiles or other masonry elements composed of cement, sand, and water.
This will keep water and other debris away from the tiles, however, grout is also widely used in a variety of other applications.
It can function as a sealer, glue, or even sculpting material.
The main disadvantage of grout is that it is tough to deal with and may be extremely dirty.
To get the desired outcomes, a significant amount of effort and patience is required.
You should also be cautious not to get grout on your clothes or skin, since it can be hard to remove.
Despite these limitations, grout is a highly adaptable material that may be utilized in a wide range of applications.
When performed correctly offer a lot of beauty and practicality to your house, while it also increases the lifespan of your tiles.
Sanded Vs Unsanded Grout:
What is Sanded Grout?

Sanded grout includes sand that gives it a gritty feel, which makes things simpler to grout together tiles of varying sizes since the sand fills in the gaps.
It also makes the grout highly resilient and less prone to cracking.
On the other hand, Sanded grout might be harder to clean since the sand can readily become embedded in the grout lines.
If you want grout that is easy to clean, go for unsanded grout.
When combined with water, Sanded grout makes a paste that may be applied to the tile’s surface.
As a result, it becomes a viable choice for individuals wishing to grout together tiles of varying sizes.
It is appropriate for use on walls and floors, kitchen, bathroom, and showering pan.
Pros:
- Sanded grout is less expensive to apply.
- It is so thick, the joints are most likely stronger.
- This is available in several colours and textures.
Cons:
- You may encounter some surface scratches.
- A water-based epoxy sealer is necessary.
What is Unsanded Grout?

Unsanded grout has no sand or gritty particles.
It Is smooth like cement that may also be known as “non-sanded,” “cement-based,” or “premixed” grout.
Unsanded grout is the finest choice for a thin line over tiles that are less than 1/8-inch thick, such as mosaic tiles.
Glass tiles can also be grouted with only sanded grout.
Since unsanded grout is smooth, it prevents scratches on the glass.
However, it is not required to use a sealing ingredient with unsanded grout, so you may use it to improve bonding and sealing.
Pros:
- In some situations, it can be utilized without any sealing substance.
- Using unsanded grout will keep the tile’s surface from scratching.
- It looks much better and it is easily removed when needed.
Cons:
- You must spend extra if you use unsanded grout.
- This grout has few colour and texture possibilities.
What is the Difference between Sanded and Unsanded Grout?
| Sanded Grout | Unsanded Grout |
| Sanded grout is more rigid than non-sanded grout, which makes it especially applicable for tile joints 1/8 inch or wider. | Unsanded grout is more suitable for thinner and narrower connections, it is mixed with latex. |
| Water is combined with sanded grout, but it is less sticky, sanded grout is typically simpler to work with than odourless grout. | Unsanded grout is more difficult to handle as it is more slippery and it is less prone to shrink and break over time than sanded grout. |
So, what grout should you use?
Sanded grout is the method to go if you’re working with bigger tile joints (1/8 inch or more).
Unsanded grout is the finest choice for minor joints, it is required when working with permeable or stain-prone materials including marble or limestone.
In addition, un-sanded grout is often more costly than sanded grout.
Sanded grout can be used on ceramic tile since it may be used on a range of surfaces.
How to apply Sanded or UnSanded Grout: Step-by-Step Guide!
Spreading grout is not a difficult process, but it can be time-consuming.
The key to success is to spend your time and avoid making mistakes, here is a step-by-step instruction for applying grout like a pro:
1. Select the Grout Type:

Grout is available in two finishes: sanded and unsanded.
Sanded grout is appropriate for high-traffic areas such as flooring.
Unsanded grout is preferable for places that will not be subjected to more wear and strain like walls.
So, you must pick which sort of grout is appropriate for your project.
2. Set Up the Area:
Once you’ve decided on the type of grout, you can begin the application procedure.
To begin, wipe the area of the place where you will be putting the grout using a moist sponge or towel.
Check for any dirt, sand, and other debris.
Then, using a tape measure, determine the area’s size.
This will help you calculate the grout quantity you will need to implement the task.
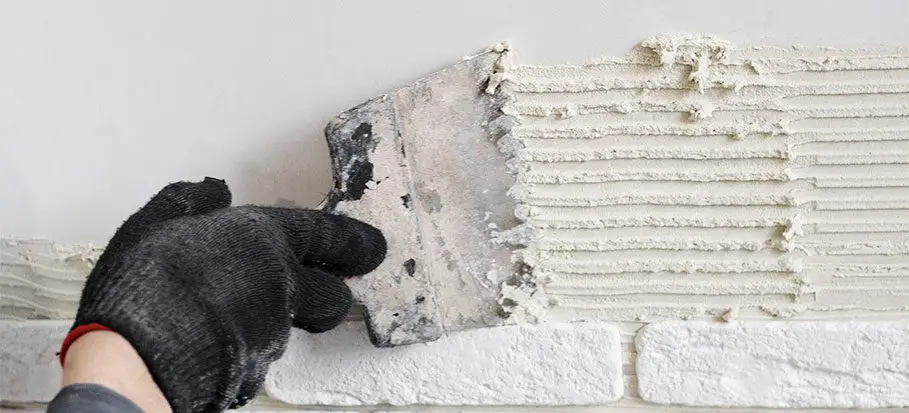
3. Mix the Grout:

After you’ve acquired all of the essential materials, it’s time to start mixing the grout.
If you’re using powder grout, simply follow the packaging recommendations.
Add water to get the desired consistency for pre-mixed grout.
To avoid clumps, fully combine the grout.
Finally, apply the grout using a putty knife.
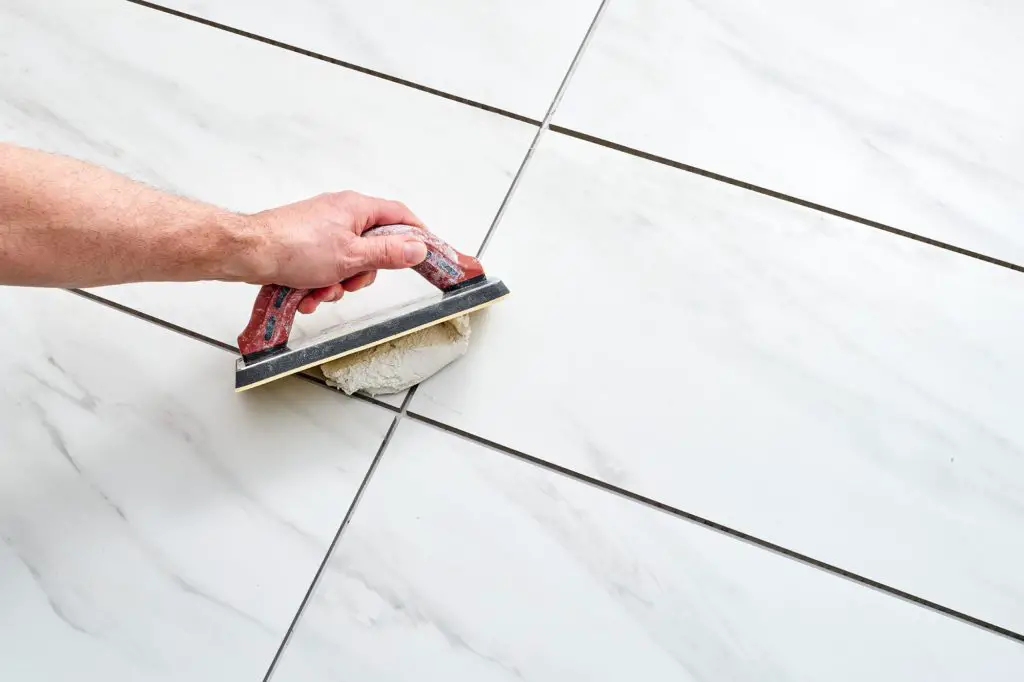
4. Apply the Grout:
Now is the time to begin applying the grout to the area.
Apply grout thoroughly across the tile surface with a rubber float.
Ensure that the grout reaches all of the gaps and corners.
A grout sponge may be used to assist remove any extra grout.
Be patient as the grout will take a bit of time to set.
5. Let the grout completely dry:
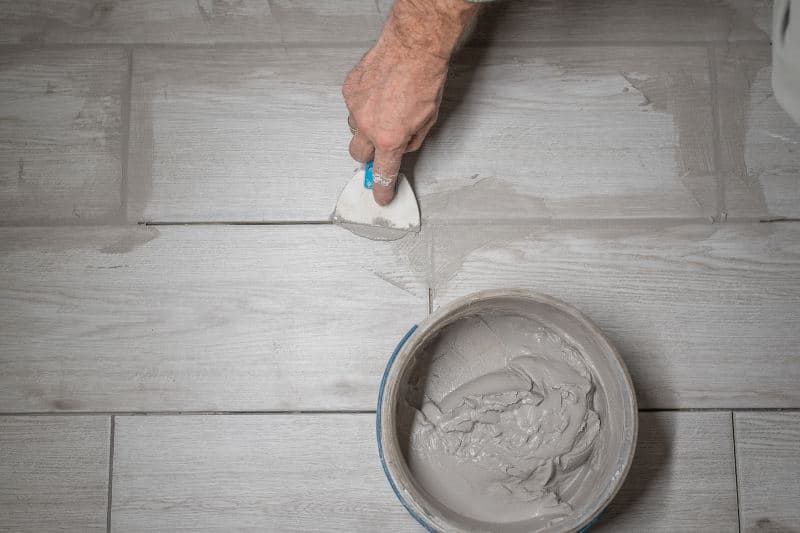
You must allow the grout to cure fully once it has been applied.
Depending on the conditions of temperature and humidity, this could take many hours or even one or two days.
Just after the grout has set, wipe away any moisture that has formed on the tile’s surface using a soft cloth.
6. Apply Grout Sealant (Optional):

When the grout is dry, seal it to help prevent it from stains and debris.
There are numerous grout sealers available on the market.
Select the most suitable type of grout.
Follow the manufacturer’s directions before applying the sealer.
7. Enjoy Your New Tile!

You may now enjoy your new tile when the grout has been placed and cured.
To maintain the tile looking its best, clean it regularly because regular care is essential for keeping the tile looking excellent for years!
Tips for Maintaining the Appearance of Sanded and Unsanded Grout:
Whether you pick sanded or unsanded grout for your tile design and installation, it is crucial to achieving it correctly to keep it looking its best.
Here are some recommendations for maintaining your grout:
- Sealing your grout will assist to avoid stains and make cleaning easier.
- To clean your grout regularly, use a mild soap and water solution or a specifically prepared grout cleaner.
- Use gentle cleansers and cleaning pads to avoid damaging the grout.
- Stains must be removed if a stain does appear on your grout.
- You should use grout paint or marker to touch up portions of your grout that are going to seem old or faded.
- You can maintain your sanded and unsanded grout look fantastic for years by following these guidelines.
Benefits of Grout on Home Surface:
When working on a home renovation, you may consider the use of grout to fill the gaps between tiles, here are some advantages as follows:
Surface Protection:
The most important advantage of grout is to protect the surface you are functioning on.
When the grout is used, it provides a barrier between the tile and the area.
This will prevent chipping or breaking of the tile.
Fill Gaps:
To fill up gaps, grout can also be utilized.
Grout can aid in the levelling of uneven tiles.
It may also be used to repair any fractures or holes in the tile.
Preventing Water Damage:
Using grout can also assist to avoid water damage.
Water can leak through any cracks in the tile and cause harm to the surface below.
You may assist to maintain the surface dry and free of water damage by filling these gaps with grout.
Enhance the Look of the Area:
Grout can also help to increase the appearance of the surface.
If your tiles are chipped or broken, grout might assist to conceal these flaws.
This will make the surface appear a lot smoother.
Also read: Grey Flooring Living Room Ideas!
FAQ- Differences Between Sanded and Unsanded Grout:
Q1. What does sanded and unsanded grout cost?
It is usually determined by the quality of the grout because unsanded grout is more costly than sanded grout.
However, sanded and unsanded grout typically costs around $16 per square foot.
Q2. Where Should I not Use Sanded and Unsanded Grout?
Sanded and unsanded grout should not be used in moist places such as the shower, kitchen, or bathroom because they absorb more water and might develop mold or mildew.
Q3. Can unsanded grout be used on walked-on surfaces?
No, unsanded grout should not be used on walked-on surfaces since it is too soft and readily ruined.
Also read: Difference between Subfloor, Joist, Underlayment & Floor Covering
Conclusion:
Sanded grout is ideal for giving your tile a glossy appearance, while unsanded grout may be ideal if you want a more subtle finish or have smaller tiles.
Whatever type of grout you pick, make sure to properly follow the instructions to achieve the best results.
Section Under: Diff