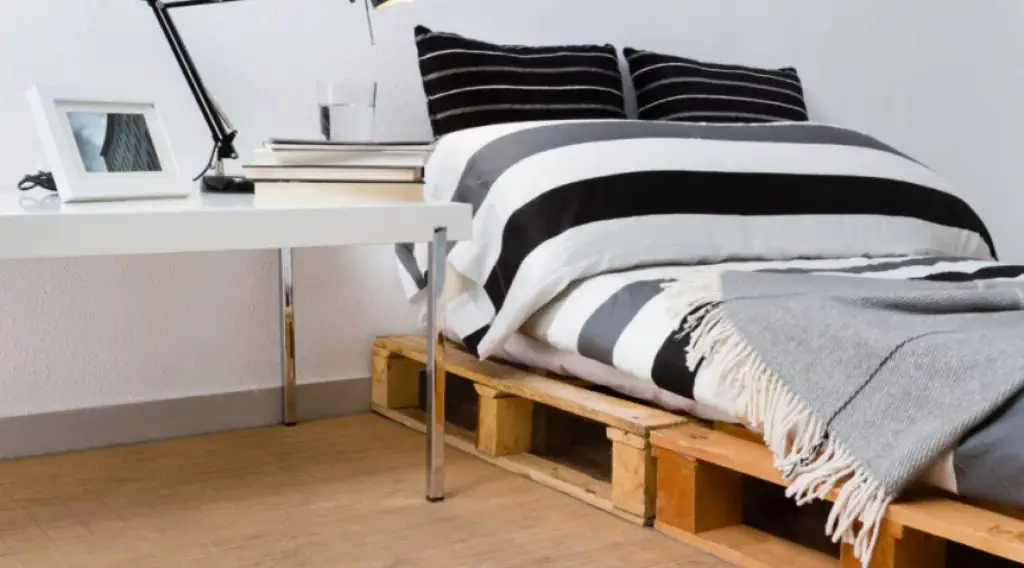
If you decide to use different types of flooring in different rooms, you must consider transitioning wood flooring between rooms.
It doesn’t matter if you’re building a new home or expanding an old one.
Particularly for wood flooring transitions, there are significant aesthetic and practical criteria.
Transition strips improve the appearance, durability, and safety of the area where wood flooring changes from one room to another.
Keep in mind that the appearance and effectiveness of the transition will vary depending on the type of wood you use and where it is installed.
In this article, I’ll examine the many types of transition strips and explain why you need them.
I’ll also discuss to harmonize wood floors by using contrast or coordination, different types of transitioning wood flooring, and how to change the orientation of wood flooring between rooms.
Is It Permissible to Change the Direction of Transitioning Wood Flooring Between Rooms?
When laid on a concrete slab base, wood flooring can be switched from room to room. Wood flooring must be set up parallel to the joists if not.
Wood flooring put parallel to joists cannot be effectively supported since it will collapse.
Since wood floors supported by joists are laid perpendicular to the joists by design, the direction is more constrained.
It is foolish to install wood flooring perpendicular to the joists. Unsupported wood planks are not structurally sound.
These planks are weak and will probably break under normal foot traffic, if not entirely on their own.
Wood flooring installations aren’t unheard of, despite the fact that slabs are frequently used to lay flooring materials like vinyl, tile, and laminate.
An excellent option is flooring made of hardwood. It does, however, need more work to accomplish so.
Before installing wood flooring, the slab needs to be thoroughly prepared because a dirty or uneven surface will make it difficult for the wood to stick.
Before installing the actual wood flooring, a subfloor must be added to the slab. The subfloor aids in shielding the flooring from any potential dampness present in the concrete slab.
Nevertheless, you are free to switch the flooring direction between rooms as you choose if you don’t mind the labor of putting wood flooring on a concrete slab.
9 Simple Ways to Transition Transitioning Wood Flooring Between Rooms:
Place a seam binder over the transition:

Use a seam binder for an immediate and simple fix. A thin metal or wood strip called a seam binder or transition strip fills the space between your flooring.
To fit the space between your floors, place the seam binder there and cut it with a saw. The seam binder should then be screwed into the subfloor.
Use T-molding:

If the two separate floors are the same height, T-molding works nicely.
T-molding is a trim made of wood or vinyl that fits in between the cracks in your floor.
The stem piece and its top are rounded. So that some of the subfloors are visible, leaving approximately 1.34 inches (4.4 cm) of a gap between the two floors.
Push the molding down to secure it by applying a line of construction glue to the top edge of one of the floorboards.
Place a threshold between rooms:

Where two wood floors converge, a threshold fits in a doorway best.
One side of a threshold is marginally taller than the other, giving it a slightly blockier appearance.
The bottom of the threshold should fit in the space between your floors.
Make sure the top edge extends 12 to 34 inches beyond the floor on one side (1.3–1.9 cm).
To secure the threshold, apply a line of construction glue to the flooring.
Use square or angle nose molding:

Place square or angle molding between floors of varying heights.
Square nose molding has a high, blocky edge to avoid tripping, while angle nose molding has a softly sloping edge.
Where the two wood floors meet, place the bottom of the molding so that it overlaps the taller flooring by 12 to 34 inches (1.3 to 1.9 cm) from the subfloor.
Use construction adhesive to glue or nail the trim into place.
Stair nose molding installation:
Between various levels, smooth transitions are made thanks to stair nose molding.
A rounded edge is added to a step-by-stair nose molding, which fits along its edge.
The molding either extends past the border of the wood or fits into the tongue and groove of the floorboard to create the transition.
Before gluing and nailing the transition in place, fit it on the step’s edge.
Use a different shade of wood:

Contrasting the hues of the wood floors makes the transition appear more deliberate.
If a room already has light wood flooring, placing it next to a wall of a darker color will naturally divide the space.
If you want a more modern style, choose darker wood, and for a more traditional look, try medium or light tones.
Put down the flooring in a new pattern:
The two wood floors are distinguishable from one another by a fresh design. Instead of arranging the floorboards all in the same direction, try an alternative strategy.
If the first floorboards are horizontal, place the second one such that it is vertical or diagonal. To add a distinctive design to your home, you may even try herringbone or parquet patterns.
Use your floorboards to create a border:
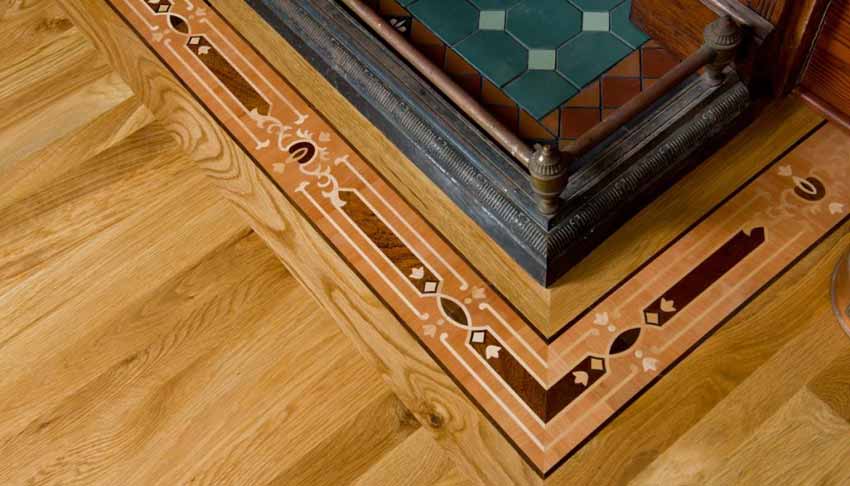
A straightforward border creates a stylish edge between the various levels.
Make a perimeter of one or two planks thick around the room when putting in the floor.
Ensure that the boards contact the other wood floor perpendicularly. Install the remaining floorboards inside the boundary after that.
Add a tile accent between your floors:

A few tiles placed in the space between your floors serve as a simple yet tasteful buffer.
Leave space for tiles in between the two hardwood floors rather than having them slam into one another.
Install the tiles between the flooring in a straightforward row or pattern, then wait for them to set.
Using grout will keep the tiles and wood flooring sealed after they are in place.
Use Parquet Flooring Patterns:

In addition to reversing the direction of wood flooring, parquetry can be used to design eye-catching floor patterns.
Wood flooring known as parquet comes in tiny pieces that click together like a jigsaw.
Numerous parquet patterns are available for you to choose from. Common designs include:
Wood flooring comprised of tiny pieces of wood laid in a zigzag pattern is known as herringbone parquet.
Herringbone-like chevrons are made of parallelograms rather than rectangles in chevron parquet, which is similar to herringbone.
Basketweave patterns are installed in a consistent pattern that alternates between the horizontal and vertical directions to resemble a weave.
Advantages of Transition Strips:
The Height Change Between Floors is More Gradual with the Help of Transition Strips.
When the height of the floors varies between rooms, transition strips should be put in place.
The more gradual height change provided by transition strips makes walking through them safer. Without them, there is a chance that someone will trip over the divide.
Transition Strips Prevent Foot Traffic on Floors:
Transition strips shield thinner wood flooring from peeling off at the transition point owing to high foot traffic, in addition to shielding you from the aforementioned trip hazard.
This is avoided by simply covering the area with a transition strip during regular use.
Adjoining floors are protected from one another by transition strips:
Wood floors exhibit a variety of behaviours in addition to visual differences. Particularly, different wood varieties react to variations in temperature and humidity at various rates.
If the types of wood flooring in your rooms are very different from one another, their natural expansion and contraction may cause harm to one another.
It will enable their breathing area to expand or contract freely with the temperature if a suitable transition strip is placed between the floors.
Transition Strips Increase the Space’s Visual Interest:
Transition strips can be a beautiful method to aesthetically combine the various hues and types of wood in your flooring.
A well-chosen transition strip aids the visual flow from one place to the next without being distracting. Unexpected changes in flooring can be unsightly.
Tips for Matching, Contrasting, and Coordinating Wood Floors:
The type of wood flooring used between rooms has a significant visual impact, even though transition strips make the flooring connections safer and more orderly.
Through contrast or synchronization, the two floors can interact with one another.
Alternatively, you can forgo the idea of a flooring transition entirely and use only one type of wood flooring in both rooms.
To unify the space, have your flooring coordinated throughout.
Comparing the floors in other rooms is an excellent alternative if you don’t like flooring transitions or just want to get the most out of your wood flooring.
Your home will appear bigger and have a better visual flow if all of its rooms have the same type of wood flooring. With an open-concept floor plan where different rooms merge, floor matching works effectively.
When rooms share the same wood flooring, it is possible to distinguish between them using other factors, such as the furnishings, appliances, wallpaper, and decorations you pick.
Use Contrast to Set Your Wood Floors Apart:
Using various types of wood flooring across rooms can produce a striking and alluring appearance. This flooring design can be created by combining various species, colors, and plank widths.
Plan your wood floors to create subtle, yet elegant, changes.
Instead of using a strong contrast between different types of wood flooring in different rooms, consider harmonizing the floors.
Find two flooring varieties that have something in common, such as a similar color or wood texture.
Also read: How to Divide a Bedroom into Two Rooms?
FAQ- Transitioning Wood Flooring Between Rooms:
Q1. Are floor transition strips required between rooms?
When switching from one thickness of the floor covering to another, transition strips are very crucial.
Thick carpet frequently transitions to concrete in some areas, as well as to other hard surfaces like wood, laminate, or linoleum.
Where exactly should floor transitions be placed?
You need to ensure that the transition from one floor to another is placed exactly in the middle of the entrance.
Simply replace the boards in the doorway’s center to complete the installation, then move on to the other room’s flooring.
Q3. How far should there be between each change in floor level?
Hardwood and laminate floors need a minimum spacing of 114 inches (3.2 cm) to allow for seasonal fluctuations in temperature and humidity-related natural expansion and contraction.
T-moulding fills up this space to make an aesthetically beautiful transition that is trip-free.
Also read: How To Install Hardwood Flooring in Bathroom?
Conclusion:
Your home can become more interesting and stylish with well-done transitioning wood flooring between rooms.
They can be used to make a strong statement or make an area feel more cohesive.
The optimal transition for your house will ultimately depend on your preferences and the overall layout of your property.
Employ skilled specialists to install your wood flooring so you can get the greatest outcomes.
They can offer you guidance on various flooring options and create a smooth transition that looks lovely and lasts for years.